
As I stood in my kitchen, the sweet scent of warm ricotta mingling with the aroma of freshly baked cookies drifted through the air, taking me straight back to my grandmother’s Italian kitchen. These Cannoli Cookies are my delightful twist on a classic dessert, wrapped in a crispy shell and filled with a creamy, dreamy filling that will make your taste buds dance. What’s even better? This easy recipe is perfect for those days when you’re craving a taste of nostalgia without spending hours in the kitchen. Plus, they’re a fantastic crowd-pleaser for family gatherings or cozy get-togethers. Are you ready to whip up a batch and share the joy? Let’s dive into this sweet adventure together!

Why are Cannoli Cookies a Must-Try?
Nostalgic Flavors: The Cannoli Cookies transport you back to simpler times with their delightful ricotta filling and crispy exterior.
Easy to Make: Featuring straightforward steps, this recipe is perfect even for novice bakers.
Crowd-Pleasing Treat: These cookies are a hit at any gathering, leaving everyone asking for seconds!
Versatile Ingredients: Feel free to experiment—substituting flavored extracts or nuts keeps things exciting!
Quick Bake Time: Ready in about 20 minutes, they satisfy sweet cravings without taking up your whole day.
Treat yourself to these irresistible cookies and consider pairing them with a warm cup of espresso or exploring other delicious options like Pumpkin Smores Cookies or Chocolate Chip Cookies for a sweet spread everyone will adore!
Cannoli Cookies Ingredients
• Get ready to create a delightful treat!
For the Cookie Dough
- All-purpose flour – Provides structure to the cookies; gluten-free flour can be used as a substitute.
- Granulated sugar – Adds sweetness and moisture; consider coconut sugar for a healthier option.
- Ricotta cheese – Contributes creaminess and moisture to the dough; ensure it’s at room temperature for easier mixing.
- Large egg – Binds ingredients for better texture; no direct substitute unless using a vegan alternative like a flax egg.
- Vanilla extract – Enhances the flavor profile; almond extract can provide a unique twist.
- Lemon zest – Adds a refreshing brightness; orange zest works well as a citrus alternative.
For the Filling
- Mini chocolate chips – Bring extra sweetness and texture; substitute chopped dark chocolate for a richer flavor.
- Chopped pistachios – Add a delightful crunch and nutty flavor; almonds can be used as a substitute but will change the taste slightly.
For Presentation
- Powdered sugar – For dusting the cookies at the end to improve their presentation; optional for a low-sugar version.
These Cannoli Cookies promise not only to satisfy your sweet tooth but also to transport you to a world of nostalgia with each delicious bite!
Step‑by‑Step Instructions for Cannoli Cookies
Step 1: Preheat the Oven
Begin by preheating your oven to 350°F (175°C). This is a crucial step in ensuring your Cannoli Cookies are baked to perfection, achieving that golden-brown crispiness. While the oven warms up, gather your mixing bowls and baking sheet, making sure to line the sheet with parchment paper for easy cookie transfer later.
Step 2: Mix Dry Ingredients
In a large bowl, whisk together 2 cups of all-purpose flour and ¾ cup of granulated sugar until they are well combined. This blend provides the essential structure for your Cannoli Cookies. Ensure there are no lumps, and the mixture appears uniform, setting the stage for a tender and delicious cookie dough.
Step 3: Combine Wet Ingredients
In a separate bowl, mix ¼ cup of ricotta cheese (room temperature), 1 large egg, 1 teaspoon of vanilla extract, and the zest of one lemon. Stir smoothly until the mixture is creamy and cohesive. This creamy blend adds moisture and flavor to your cookie dough, reflecting the nostalgic essence of traditional cannoli.
Step 4: Form the Dough
Gradually incorporate the dry mixture into the wet ingredients, stirring gently until a soft dough forms. Be careful not to overmix, as achieving a light texture is key. At this point, the dough should be slightly sticky yet manageable, embodying the perfect balance for your Cannoli Cookies.
Step 5: Rest the Dough
Cover the dough with plastic wrap or a clean kitchen towel and set it aside to rest for approximately 30 minutes. This resting period allows the gluten to relax, yielding a more tender cookie, and enhances the overall flavor as the ingredients meld together beautifully.
Step 6: Roll Out the Dough
On a floured surface, roll out the rested dough to about ¼ inch thick. Using a sharp knife or pizza cutter, cut the dough into 2×3 inch rectangles, ensuring they are uniform for even baking. This step creates the canvas for your luscious filling, so take your time to enjoy the process.
Step 7: Prepare the Filling
In a small bowl, mix the remaining ¼ cup of ricotta cheese with a ½ cup of mini chocolate chips and ¼ cup of chopped pistachios until evenly blended. This filling not only adds sweetness but also a delightful crunch, reminiscent of the traditional cannoli filling that gives each cookie its unique charm.
Step 8: Assemble the Cookies
Place a small dollop of filling on each dough rectangle, then gently fold the dough over to encase the filling. Pinch the edges securely to seal them, ensuring the creamy goodness stays tucked inside while baking. A proper seal is essential, as it keeps the filling intact during the baking process.
Step 9: Bake the Cookies
Carefully transfer the filled Cannoli Cookies onto the prepared baking sheet, ensuring they are spaced out for even baking. Bake in the preheated oven for 15-18 minutes, or until they turn a beautiful golden brown. Keep a close eye during the last few minutes to avoid over-baking, as the texture is key.
Step 10: Cool and Dust
Once baked, allow the cookies to cool slightly on the baking sheet for about 5 minutes before transferring them to a wire rack. Once they are completely cool, dust the cookies with powdered sugar to enhance their presentation and add a touch of sweetness, inviting you to enjoy a delightful bite of nostalgia.

Make Ahead Options
These Cannoli Cookies are an absolute lifesaver for busy weeknights or last-minute gatherings! You can prepare the cookie dough up to 24 hours in advance—just wrap it in plastic wrap and refrigerate. Similarly, you can mix the ricotta filling and store it in an airtight container for up to 3 days in the fridge to keep it fresh and flavorful. When you’re ready to bake, simply roll out the dough, fill with the prepared mixture, and pop them in the oven for that warm, freshly-baked goodness. This way, you can enjoy restaurant-quality Cannoli Cookies with minimal effort, all while savoring that nostalgic taste right from your own kitchen!
What to Serve with Cannoli Cookies?
These delightful treats can bring a touch of Italian charm to your dining table, melding beautifully with various accompaniments.
- Rich Espresso: The bold flavor of espresso pairs perfectly with the creamy filling of the cookies, enhancing their sweetness and texture.
- Whipped Cream: A dollop of lightly sweetened whipped cream adds a luxurious touch, elevating each bite to a delightful dessert experience.
- Fresh Berries: Juicy raspberries or strawberries provide a refreshing contrast, balancing the richness of the Cannoli Cookies beautifully.
- Gelato: Serving a scoop of classic vanilla or pistachio gelato alongside creates an indulgent Italian-inspired dessert duo.
- Chocolate Sauce: Drizzle warm chocolate sauce over the cookies for an extra layer of indulgence that no one can resist.
- Nutty Biscotti: Pairing with almond or hazelnut biscotti brings a crunchy texture that complements the soft, creamy filling of the cookies.
- Limoncello: Enjoy a shot of this sweet lemon liqueur for a refreshing palate cleanser that enhances the cookie’s flavors.
- Milk: A tall glass of cold milk creates a comforting combination, perfect for sharing with loved ones after a meal.
Indulge in these delightful pairings and make your dessert experience memorable!
Expert Tips for Cannoli Cookies
Sift the Flour: Ensure you sift the flour for a lighter texture; this simple step makes all the difference in your final cookies.
Mix Gently: Do not overmix the dough—mix until just combined to maintain tenderness and create that ideal soft texture in your Cannoli Cookies.
Sharpen Your Tools: Use a sharp knife or pizza cutter for clean cuts; this will make your cookie shapes neat and ensure even baking.
Cool Before Dusting: Allow cookies to cool before dusting with powdered sugar; this prevents the sugar from melting and keeps your cookies looking beautiful.
Watch Bake Time: Keep a close eye during the last minutes of baking; over-baking can lead to dry cookies instead of the perfect crispy texture.
Indulge in these tips to create your perfect batch of Cannoli Cookies that everyone will love!
Cannoli Cookies Variations & Substitutions
Explore the endless possibilities for bringing your Cannoli Cookies to life with these delightful twists!
- Gluten-Free: Replace all-purpose flour with a gluten-free flour blend to accommodate gluten sensitivities without sacrificing taste.
- Sweetener Swap: For a healthier treat, use coconut sugar instead of granulated sugar to add a subtle caramel flavor.
- Vegan Option: Substitute the egg with a flax egg (1 tablespoon ground flaxseed mixed with 2.5 tablespoons water) for a plant-based twist!
- Flavor Boost: Experiment with flavored ricotta, such as lemon or chocolate, to elevate the filling to new heights of deliciousness.
- Nutty Variety: Instead of pistachios, try using chopped hazelnuts or walnuts for a different crunchy texture and flavor.
- Citrus Twist: Swap lemon zest for orange zest to introduce a warm, fruity note to the cookie dough.
- Chocolate Indulgence: Try using mini dark chocolate chips in your filling for a richer chocolatey experience, balancing perfectly with the creaminess.
- Fruity Fill: Incorporate dried fruit like chopped cherries or cranberries into your filling for a chewy surprise that complements the creamy texture.
Dive into these variations and make your Cannoli Cookies a unique creation that resonates with your personal taste! If you’re craving even more sweet options, check out Pumpkin Oat Cookies or indulge in some Tiramisu Cookies Steal for a delightful dessert spread.
How to Store and Freeze Cannoli Cookies
Room Temperature: Keep cookies in an airtight container at room temperature for up to 3 days. Layer with parchment paper to prevent sticking and maintain freshness.
Fridge: If you prefer a chilled treat, store them in the refrigerator, where they will stay fresh for up to a week. Just remember that they’ll be firmer after cooling!
Freezer: For longer storage, wrap the cookies tightly in plastic wrap and then place them in a freezer bag. They can be frozen for up to a month; just thaw at room temperature before enjoying.
Reheating: To restore their original flavor and texture, briefly warm cookies in the oven at 300°F (150°C) for about 5 minutes before serving. Enjoy your Cannoli Cookies!
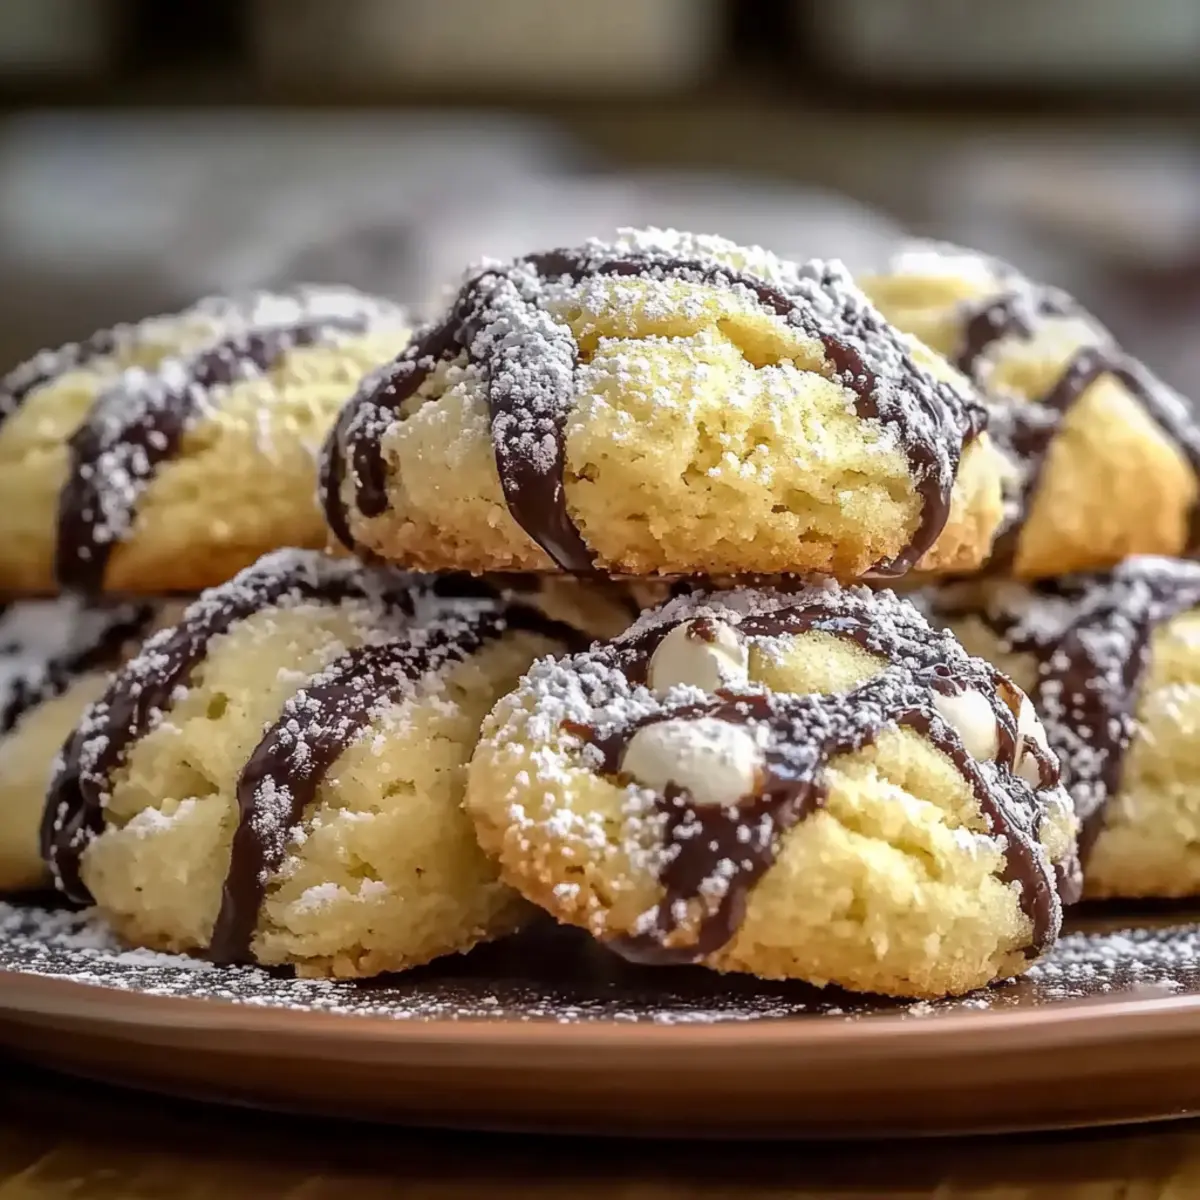
Cannoli Cookies Recipe FAQs
How can I tell if my ricotta cheese is fresh?
Absolutely! Look for ricotta cheese that is creamy and has a smooth texture. It should be free from dark spots or a sour smell. Choose ricotta that’s within the expiration date and kept in a properly refrigerated environment to ensure optimal freshness for your Cannoli Cookies.
What is the best way to store leftover Cannoli Cookies?
Very easy! Place your cookies in an airtight container at room temperature for up to 3 days. For longer storage, layer them with parchment paper to avoid sticking, or keep them in the fridge for up to a week. This method maintains moisture and freshness, ensuring every bite remains delightful!
Can I freeze Cannoli Cookies, and what’s the best way to do it?
Absolutely, freezing is a fantastic option for these cookies! Wrap each cookie tightly in plastic wrap, then place them in a freezer-safe bag or container. They can stay good for up to a month. When you’re ready to enjoy them, simply thaw them at room temperature. If you’d like a warm treat, pop them in the oven at 300°F (150°C) for about 5 minutes for that freshly baked feel!
What should I do if my cookie dough is too sticky?
If your dough feels overly sticky, simply dust your work surface and your rolling pin with a little flour while rolling it out. Alternatively, place the dough in the fridge for about 15-20 minutes. This cooling period can help firm up the dough and make it easier to work with, giving you those perfect Cannoli Cookies!
Are Cannoli Cookies safe for people with nut allergies?
If you’re preparing Cannoli Cookies for those with nut allergies, simply omit the chopped pistachios from the filling and consider using chocolate chips that are free from cross-contamination. You can also include alternative toppings like toasted coconut or even leave them plain, which ensures they are enjoyable for everyone at your gathering.
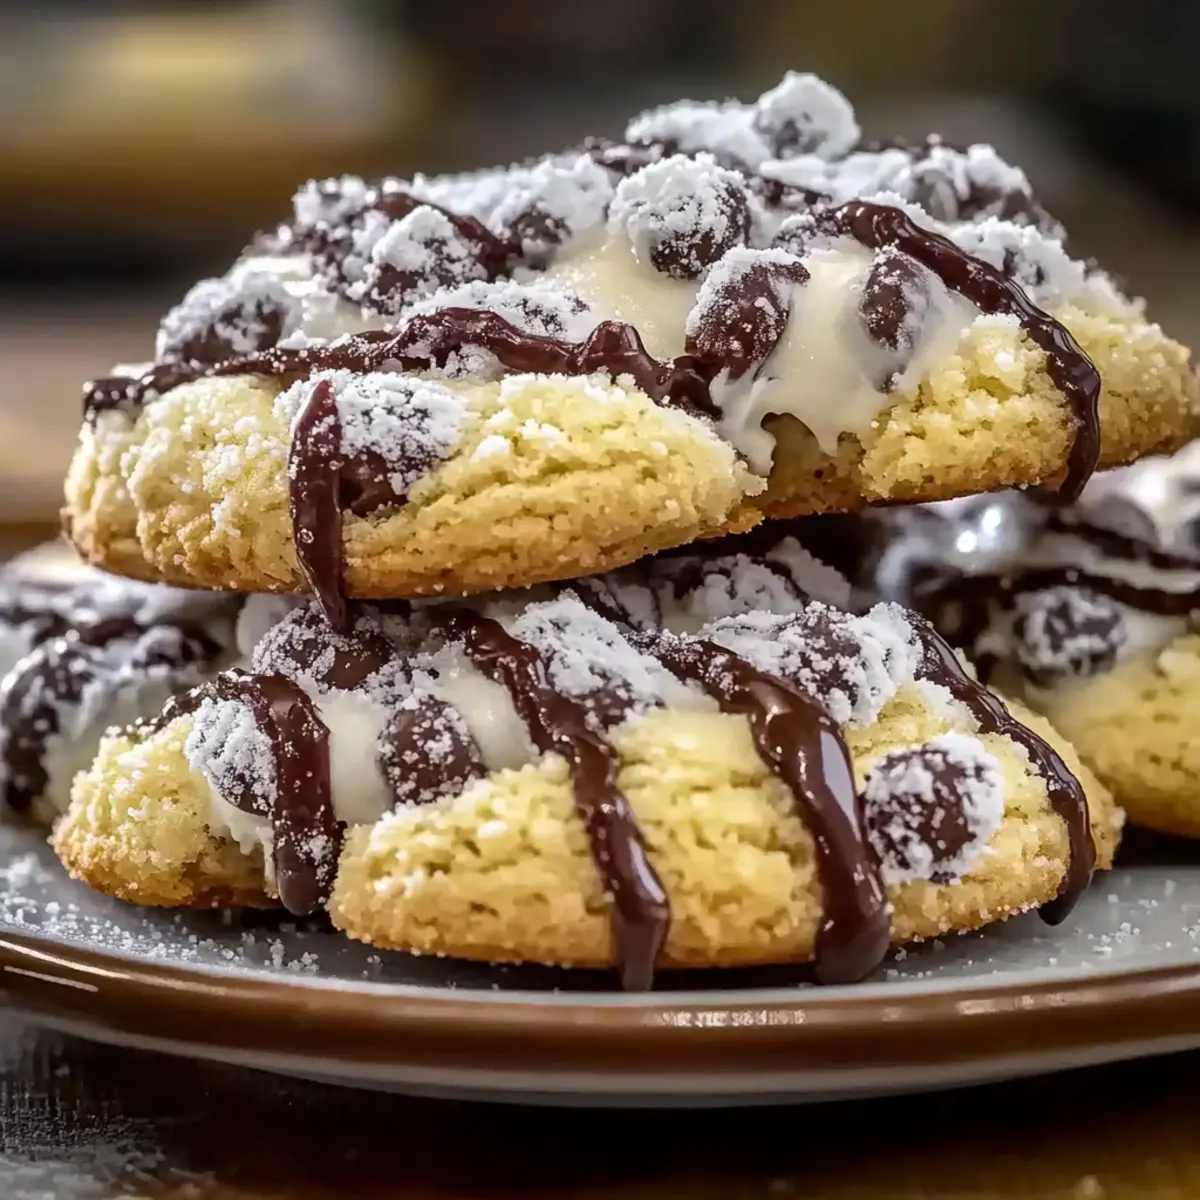
Delicious Cannoli Cookies for Sweet Nostalgic Moments
Ingredients
Equipment
Method
- Preheat your oven to 350°F (175°C) and line a baking sheet with parchment paper.
- In a large bowl, whisk together the all-purpose flour and granulated sugar until well combined.
- In a separate bowl, mix the ricotta cheese, egg, vanilla extract, and lemon zest until creamy.
- Gradually mix the dry ingredients into the wet mixture, stirring gently until a soft dough forms.
- Cover the dough with plastic wrap and let it rest for approximately 30 minutes.
- Roll out the dough to 1/4 inch thick and cut into rectangles 2x3 inches.
- In a small bowl, mix the remaining ricotta cheese with mini chocolate chips and chopped pistachios until blended.
- Place a dollop of filling on each rectangle, fold the dough over, and pinch the edges to seal.
- Transfer the filled cookies to the prepared baking sheet and bake for 15-18 minutes until golden brown.
- Allow cookies to cool slightly, then dust with powdered sugar before serving.
Leave a Reply