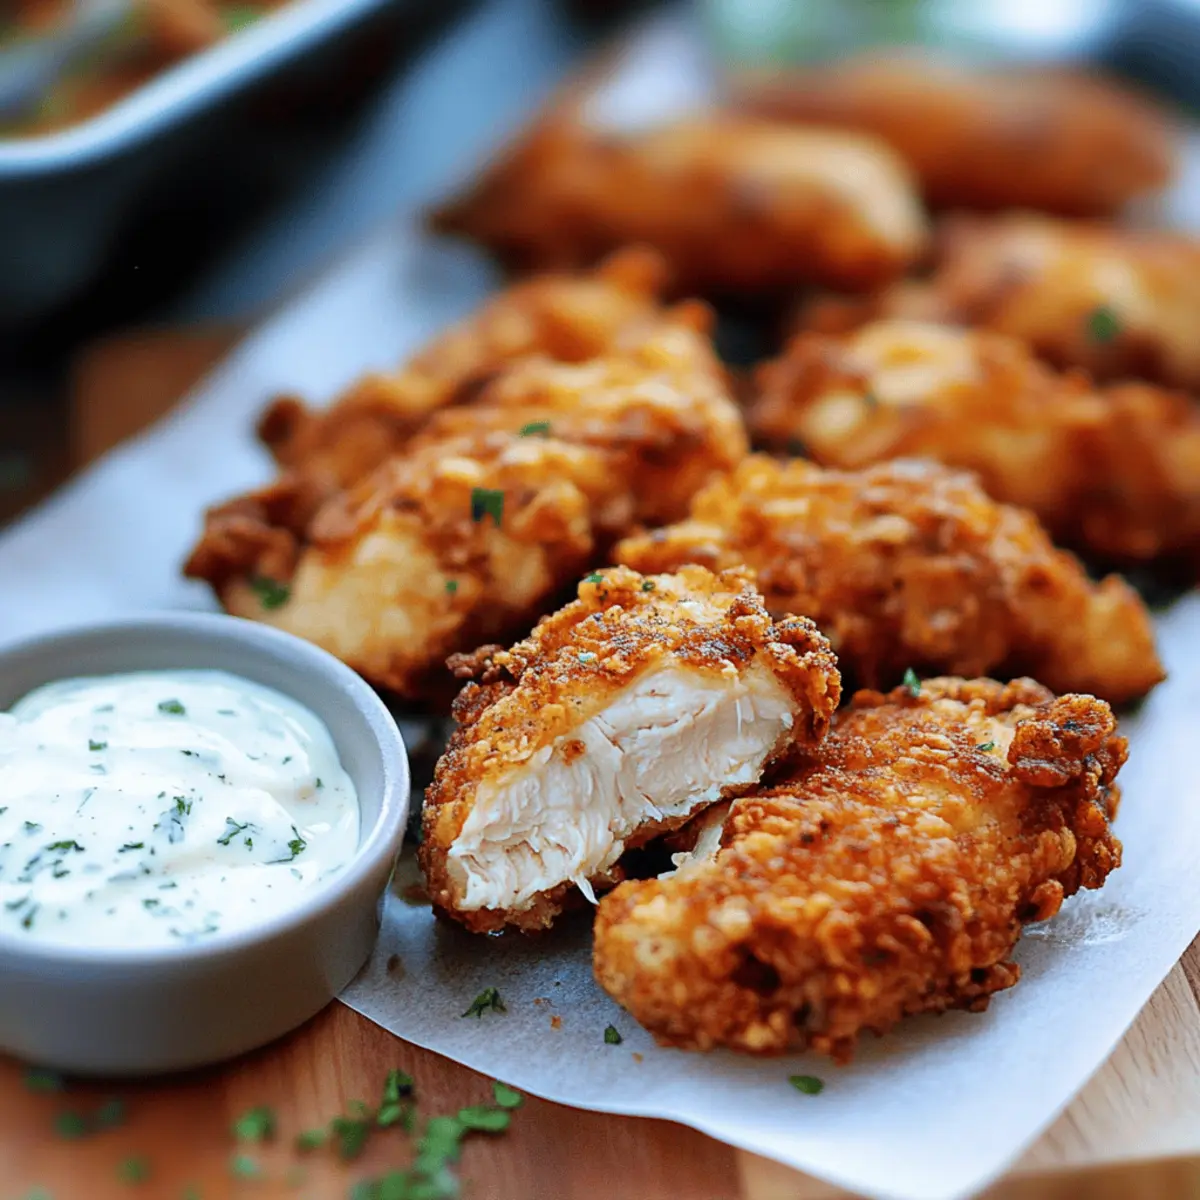
With game day just around the corner, I found myself daydreaming about the irresistible crunch of Crispy Ranch Chicken Tenders. These little gems of comfort food are the perfect antidote to the usual fast-food cravings. Picture succulent chicken tenderloins soaking in a luscious buttermilk bath, then getting enveloped in a flavorful Ranch-inspired coating before taking a hot, sizzling plunge into golden oil. Not only are these tenders family-friendly and quick to whip up, but they’re also a crowd-pleaser that pairs beautifully with your favorite dipping sauces. Whether you’re frying them up or giving the healthier air fryer method a try, your taste buds are in for a real treat. Are you ready to elevate your snacking game?

Why Are These Ranch Chicken Tenders Irresistible?
Simplicity: These Crispy Ranch Chicken Tenders are incredibly easy to make, perfect for both novice cooks and seasoned chefs looking for a quick meal.
Flavor Explosion: The marriage of juicy chicken and zesty Ranch seasoning creates a bold flavor that your family will adore.
Versatility: Whether you choose traditional frying or the healthier air fryer option, these tenders maintain their delicious crunch.
Crowd-Pleaser: They’re an ideal game day snack or a delightful dinner option that everyone will crave.
Make-Ahead Friendly: Prep them ahead of time and reheat for a satisfying snack that beats fast food any day! For another game day option, don’t forget to check out these Cheesy Garlic Chicken wraps!
Ranch Chicken Tenders Ingredients
Here’s everything you need to create these delightful Crispy Ranch Chicken Tenders that will wow your family.
For the Chicken
- Boneless, Skinless Chicken Tenderloins – A juicy source of protein; feel free to substitute with chicken breasts if desired.
- Buttermilk – Tenderizes chicken and enriches flavor; whole milk with vinegar or lemon juice works as a great alternative.
For the Coating
- All-Purpose Flour – Essential for that crispy coating; gluten-free flour can be an excellent substitute.
- Buttermilk Ranch Dressing Seasoning Mix – Infuses the tenders with essential spices and herbs; homemade ranch seasoning can also be used.
- Coarse Ground Black Pepper – Adds a subtle heat for depth; adjust according to your spice preference.
- Dried Parsley – Enhances both flavor and presentation; you may use fresh parsley or skip it for simplicity.
For Frying
- Canola or Peanut Oil – Needed for frying to achieve that perfect crisp; coconut oil is a flavorful alternative.
Now that you have the ingredients, let’s get cooking and make some unforgettable Ranch Chicken Tenders!
Step‑by‑Step Instructions for Crispy Ranch Chicken Tenders
Step 1: Prepare the Oil
Begin by heating about two inches of canola or peanut oil in a Dutch oven, cast iron skillet, or deep fryer. Set the temperature to 375°F (190°C) and allow it to reach this perfect frying point. This will ensure your Crispy Ranch Chicken Tenders cook evenly and achieve that coveted golden-brown crispiness.
Step 2: Soak the Chicken
While the oil heats, take your boneless, skinless chicken tenderloins and place them in a large mixing bowl. Pour in enough buttermilk to completely cover the chicken. Let them soak for at least 15-20 minutes; this will tenderize the meat and infuse it with flavor, ensuring each tenders stays juicy during frying.
Step 3: Make the Coating
In a shallow bowl, combine all-purpose flour, the buttermilk ranch dressing seasoning mix, coarse ground black pepper, and dried parsley. Whisk together until fully mixed. This flavorful coating will give your Ranch Chicken Tenders an irresistible crunch that balances perfectly with their juicy marrow.
Step 4: Coat the Chicken
Remove each chicken tender from the buttermilk, allowing excess liquid to drip off. Dip it into the prepared flour mixture, making sure to coat it evenly by pressing lightly to adhere. Shake off any extra flour and repeat this process for all chicken tenderloins, ensuring they all have a generous coating for that delicious crunch.
Step 5: Fry the Tenders
Once the oil is at the right temperature, carefully place the coated chicken tenders in the hot oil. Fry them in batches, being cautious not to overcrowd the pan. Cook the tenders for 5-8 minutes on each side, or until they are golden brown and crispy. A thermometer or visual cues of deep golden color will guide you on just the right doneness.
Step 6: Drain and Serve
As each batch of Crispy Ranch Chicken Tenders finishes frying, transfer them to a wire rack set over a paper towel-lined baking sheet. This will allow excess oil to drain off, ensuring your tenders remain crisp. Serve them warm with a selection of your favorite dipping sauces and enjoy a family-friendly treat everyone will love!

Expert Tips for Crispy Ranch Chicken Tenders
-
Monitor Oil Temperature: Use a thermometer to keep the oil at 375°F (190°C). This helps achieve the ideal crispy coating without burning.
-
Let It Rest: Allow the coated chicken to rest for a few minutes before frying. This encourages even cooking and enhances crunchiness.
-
Avoid Overcrowding: Fry in batches and don’t overcrowd the pan; this prevents soggy tenders by allowing proper heat circulation.
-
Air Fry for Health: For a lighter option, replace 1 cup of flour with panko breadcrumbs and air fry at 400°F (204°C) for delightful Ranch Chicken Tenders without the guilt.
-
Spice It Up: For an extra kick, mix in cayenne pepper or paprika into the coating to elevate the flavor profile.
-
Serve Fresh: Enjoy the tenders right after cooking for the best texture, but remember you can reheat leftovers in a 350°F (175°C) oven for a satisfying snack!
Make Ahead Options
These Crispy Ranch Chicken Tenders are ideal for meal prep enthusiasts looking to save time on busy weeknights! You can soak the chicken tenderloins in buttermilk up to 24 hours in advance; this not only tenderizes the chicken but enhances the flavor as well. Additionally, you can coat the tenders with the flour mixture and refrigerate them for up to 3 days before frying. When you’re ready to enjoy, simply heat your oil and fry the coated tenders straight from the fridge for a quick, easy dinner that’s just as delicious as if you made them from scratch! These steps ensure your tenders remain crispy and satisfying when served.
What to Serve with Crispy Ranch Chicken Tenders
Serving up a memorable meal is a delightful canvas for your culinary creativity, especially alongside these mouthwatering tenders.
-
Creamy Coleslaw: This crunchy, tangy side adds a refreshing contrast to the rich flavors of the chicken.
-
Crispy French Fries: Golden, salty fries are a classic pairing that enhances the crunch factor of your tenders. They make every bite feel like a treat!
-
Garlic Breadsticks: Their buttery, garlicky essence complements the savory chicken perfectly. Don’t forget a warm marinara dipping sauce for extra flavor!
-
Cheesy Macaroni: Creamy mac and cheese with gooey cheese layers creates a rich, comforting plate that feels like a warm hug alongside your tenders.
-
Fresh Garden Salad: A light mix of greens, cherry tomatoes, and cucumbers can balance the meal perfectly. Add a tangy vinaigrette to brighten each bite.
-
Buffalo Sauce: Drizzle or dip your chicken tenders in spicy buffalo sauce for a fiery kick that will elevate them to new heights.
With these delightful sides and sauces, your Crispy Ranch Chicken Tenders will shine even brighter, guaranteeing a meal that your family will love!
Variations & Substitutions for Ranch Chicken Tenders
Feel free to tweak these Crispy Ranch Chicken Tenders to suit your taste preferences and dietary needs!
-
Spicy Kick: Add cayenne pepper or paprika to the flour mixture for heat. The spicy twist will elevate the flavor profile and awaken your taste buds!
-
Herb Twist: Swap out Ranch seasoning for Cajun or Italian herbs for new taste adventures. Greek seasoning can also lend a delightful Mediterranean flair!
-
Gluten-Free Option: Use gluten-free flour as a perfect substitution for a crispy coating. This way, everyone can enjoy a tasty treat!
-
Baking Alternative: Try baking them at 375°F for 15-20 minutes instead of frying to achieve a healthier version. An air fryer works wonders for a delightful crunch!
-
Panko Crunch: Substitute part of the flour with panko breadcrumbs for a textured bite. This adds an additional layer of crunchiness that’s hard to resist!
-
Fresh vs. Dried Herbs: Feel free to use fresh parsley instead of dried for a vibrant taste and added freshness. Using fresh herbs can transform the flavor experience completely.
-
Flavor Boost: Incorporate grated Parmesan cheese into the coating mix for added richness. It’s a simple way to make your tenders even more delicious!
-
Zesty Dip: Serve with unexpected dipping sauces like spicy aioli or a creamy avocado dip for a fun twist. These will elevate your whole snacking scene!
Once you try these variations, you may find a new favorite! For a hearty meal alongside these tenders, you might enjoy pairing them with Creamy Crack Chicken Gnocchi or even a refreshing side of coleslaw. Happy cooking!
How to Store and Freeze Ranch Chicken Tenders
Fridge: Store your leftover Ranch Chicken Tenders in an airtight container. They will stay fresh for up to 3 days, retaining their delicious flavor.
Freezer: For longer storage, freeze the cooked tenders in a single layer on a baking sheet before transferring them to a freezer-safe bag. They can be stored for up to 2 months.
Reheating: To bring back the crunchy texture, reheat in a 350°F (175°C) oven for about 10-15 minutes, or until heated through and crispy.

Crispy Ranch Chicken Tenders Recipe FAQs
How do I choose the best chicken for my Ranch Chicken Tenders?
Absolutely! When selecting chicken, look for boneless, skinless chicken tenderloins that are firm and pale pink with no dark spots. Fresh chicken should have minimal odor, while frozen tenderloins should be stored without freezer burn.
How should I store leftover Ranch Chicken Tenders?
Place your leftover tenders in an airtight container and keep them in the refrigerator. They will stay fresh for up to 3 days, retaining their delicious flavor and texture. Make sure they completely cool down before sealing to prevent moisture build-up.
Can I freeze my Crispy Ranch Chicken Tenders?
Yes! For longer storage, freeze the cooked tenders in a single layer on a baking sheet for about 1-2 hours until firm. Once frozen, transfer them to a freezer-safe bag. They can be stored for up to 2 months. Label with the date for easy management!
What if my chicken tenders turn out soggy?
Very! To prevent sogginess, ensure your oil is hot enough (375°F/190°C) before frying. Avoid overcrowding the pan to ensure steam escapes and air circulates around each tender. You can also let the coated tenders rest for a few minutes before frying to help the coating adhere better.
Are these Ranch Chicken Tenders suitable for kids or those with dietary restrictions?
Absolutely! These tenders can be made kid-friendly by using less pepper in the coating. For those with gluten sensitivity, substitute all-purpose flour with a gluten-free flour blend. Just ensure any seasoning mixes used are also gluten-free, and you’re good to go!
How do I reheat frozen Crispy Ranch Chicken Tenders?
For the best results, preheat your oven to 350°F (175°C). Place the frozen tenders on a baking sheet and heat for about 15-20 minutes, or until they are heated through and regain their crispy texture. An air fryer can also be a great option for this!

Crispy Ranch Chicken Tenders That Will Wow Your Family
Ingredients
Equipment
Method
- Begin by heating about two inches of canola or peanut oil in a Dutch oven, cast iron skillet, or deep fryer to 375°F (190°C).
- Place chicken tenderloins in a large mixing bowl and cover them with buttermilk. Let them soak for at least 15-20 minutes.
- In a shallow bowl, combine all-purpose flour, ranch seasoning mix, black pepper, and dried parsley. Whisk until fully mixed.
- Remove chicken from buttermilk and coat in the flour mixture, ensuring an even coating. Shake off extra flour.
- Carefully fry the coated chicken tenders in batches for 5-8 minutes on each side until golden brown and crispy.
- Transfer finished tenders to a wire rack set over a paper towel-lined baking sheet to drain excess oil.

Leave a Reply